Chocolate, Almond Pancakes (gluten-free)

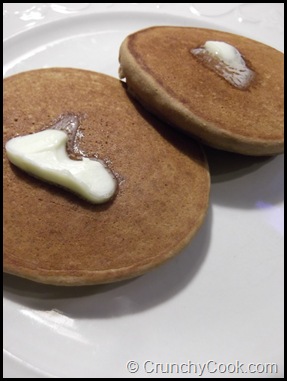
Pancakes[Update: I’m now allergic to dairy and eggs, but it’s still a good recipe.  So I’ve left it on the blog]

Due to blood sugar issues, I find that if I eat too many pancakes all at once it makes me feel sort of off because I’m not getting enough protein.  So I recently bought my very first bag of almond flour because it’s supposed to be a nice way of adding protein to things.  I also found that I really liked the rich, slightly sweet hint that the almond flour added to the pancakes.

Providing I use a sugar-free syrup, I found that with the addition of almond flour I didn’t really notice my blood sugar doing anything funky.  If that’s not enough of an adjustment for your blood sugar though, try making it a full-on gourmet breakfast buy cooking up some bacon or eggs to go along with it.          


Allergen/Sensitivity Info: Gluten/wheat-free, sugar-free, nut-free.

Yields: About a dozen small pancakes.

Ingredients:

  • About 1 cup brown rice flour
  • 2 tablespoons almond flour
  • 2 tablespoon Splenda (or any generic version of sucralose)
  • 1 teaspoon gluten-free baking powder (read the ingredient label to be sure it’s safe)
  • 1 teaspoon coco powder (optional)
  • 1/4 teaspoon baking soda
  • 1/4 teaspoon salt
  • 1 beaten egg
  • 1 cup milk
  • 2 tablespoons cooking oil

Optional Ingredients:

  • 1/4 teaspoon vanilla
  • 1/4 teaspoon cinnamon
  • 1 banana cut up into small pieces (if you’re not too keen on bananas, apples or blueberries also work well)

Directions:

  1. Mix buttermilk/sour milk, cooking oil, egg in a bowl.
  2. Add to tablespoons of almond flour to a 1 cup measuring cup.  Then, fill it the rest of the way with brown rice flour.
  3. Combine the remaining ingredients in a separate bowl.  Then, mix the contents of both bowls together.  Don’t worry about getting all of the lumps out.
  4. If the batter is too runny add more rice flour, if it’s too thick add more milk.  The almond flour tends to be very absorptive, so it’s more likely you’ll need to add more milk.
  5. Pour 1/4 cup batter onto an already greased griddle/skillet (it should make about a dozen pancakes).
  6. Cook them on a medium heat—if the heat is too high, the outside of the pancake will burn before the center is fully cooked.
  7. Wait until the pancakes are just beginning to get bubbly and the edges are starting to turn a light brown before turning them over.
  8. Top with as much butter and sugar-free syrup as you like.  And enjoy.

Oatmeal Muffins (gluten-free & sugar-free)

Muffins[Update: Sadly, due to things like eggs, milk, and oats this recipe is no longer something I can eat.  But it’s yummy, so I’ve left it on the blog]

My gluten-free oatmeal muffins were very loosely based on the basic muffin recipe in my Better Homes and Gardens® Cook Book.  Even though I can’t eat most of the recipes without making alterations, it’s still one of my favorite cookbooks because it’s great for getting ideas and the cooking tips and suggestions are helpful.  I love it.       

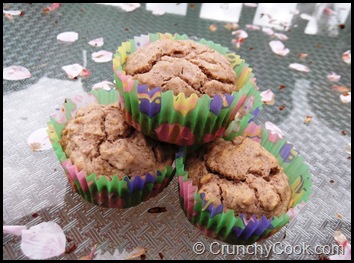
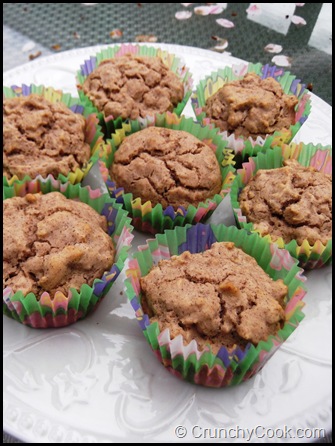
I was very happy with how well these muffins turned out.  And, to my surprise, the wheat-eaters in the family even enjoyed them, commenting how they wouldn’t have known they were gluten-free.  The oatmeal (gluten-free variety, of course) added texture, which was nice since most nuts are off limits due to allergies.  Perhaps next time I’ll try banana or blueberry.  What are your favorite types of muffins?


Serving: Makes 12 muffins (if you’re using a standard sized cupcake tin)

Ingredients:

  • 1 and 1/3 cup rice flour
  • 3/4 cup oats (most oats are not gluten-free, so I recommend Bob’s Red Mill Gluten-free Oats)
  • 1 cup Spenda (or generic brand of sucralose)
  • 2 teaspoons baking powder
  • 2 teaspoons cinnamon
  • 1/2 teaspoon salt
  • 3/4 cup milk
  • 1 egg beaten
  • 1/4 cup cooking oil

Directions:

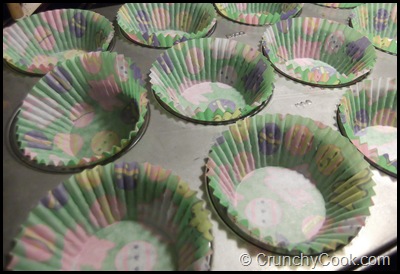
1.  Place liners in the cupcake tin.

Step 1

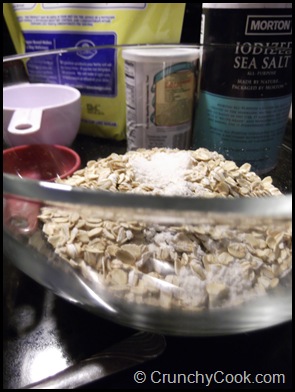
2.  Mix dry ingredients together in a bowl (everything except the oil, milk, and egg).  In a separate bowl, mix the wet ingredients together.  Add the wet ingredients to the dry ingredients and mix until moistened (it’s fine if it’s still lumpy).

Step 2

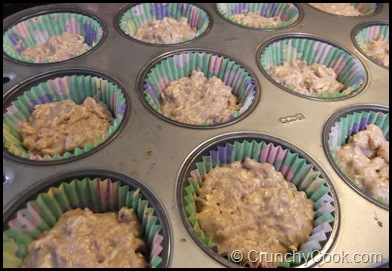
3.  Spoon the batter into the cupcake liners, leaving room for them to grow (filling about 2/3 of the way seems to work well).

DSCF0764

4.  Bake at 400 degrees for 18 minutes (a toothpick should come out clean).

5.  They can be served hot, but they’ll be more apt to fall apart when you’re eating them.  Or if you let them cool in the refrigerator before eating, they’ll hold together better.  Whenever you decide to serve them, enjoy.  They taste great with butter.

Step 5 (2)

Pepperoni Pizza (gluten-free & low carb)

Pizza[Update: Sadly, due to new allergies, this isn’t something I can eat anymore.  But I still highly recommend it if you’re gluten-free or on a low carb diet]
One of the low points commonly reached by newly gluten-free folks is the oh-my-gosh-I’ll-never-eat-pizza-again phase.

Of course, this isn’t true because there are several good pizza options and some restaurants now even serve gluten-free pizzas.  But when you’re new, all you know is that your favorite comfort food is suddenly strictly off-limits.

That’s why this cream cheese crust was such an exciting discovery when I first went gluten-free.  This recipe is a modified version of Suzanne Somers’ Mini-Pepperoni Pizzas from her book Suzanne Somers’ Fast & Easy.  While I don’t recommend Suzanne’s books for newbies because they’re not specifically gluten-free, she has a lot of low-carb, grain-free recipes in her books that I’ve found very helpful!  


Ingredients for Crust:

  • 1 (8-ounce) packed of cream cheese (room temperature)
  • 2 eggs
  • Salt
  • Pepper
  • 1/4 cup grated parmesan cheese

Ingredients for Toppings:

  • 1/3 cup marinara sauce (if you use a can, make sure to read the ingredient list to make sure it’s okay for your diet)
  • Pinch of cayenne pepper
  • 1/2 teaspoon oregano
  • 1 cup mozzarella cheese (shredded)
  • Package peperoni (I used turkey because I can’t eat beef)
  • 2 small zucchinis (optional)
  • 3 Tomatoes (optional)
  •   Parmesan (just enough to sprinkle on top of the pizza)

Directions:

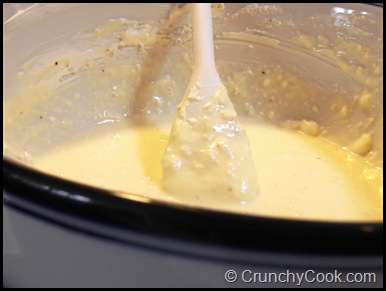
1. Mix cream cheese and eggs together with a spoon.  Once mixed together, add salt and pepper (just a dash for seasoning).  And then blend in the parmesan.

2. Butter a 9 x 13 inch baking dish.  Pour the cream cheese mixture into the dish and bake at 350 for 15 minutes (the crust should be a light golden brown but not burnt).  Once out of the oven, let the crust cool before adding marinara sauce or toppings.

DSCF06892

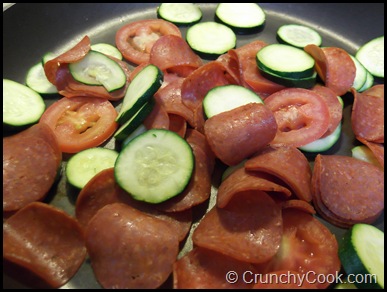
4. Cut up the zucchini and tomatoes and sauté them in a pan with the pepperoni.

DSCF0699

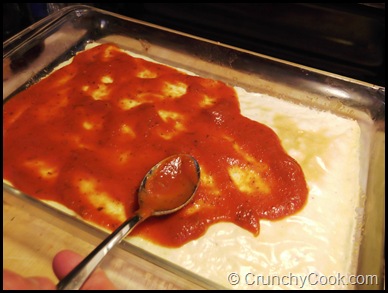
5. Thinly spread marinara sauce over the cooled cream cheese crust.

DSCF0701

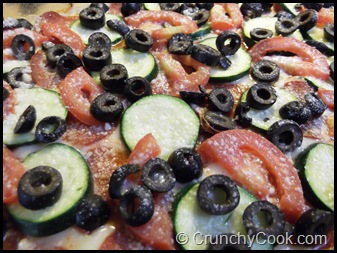
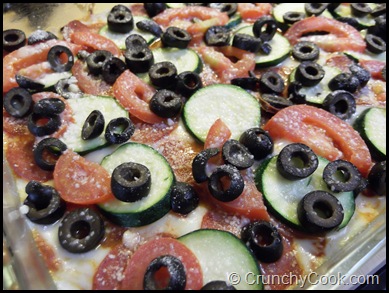
6. Add mozzarella cheese, zucchini, pepperoni, tomatoes, olives, and parmesan on top (it helps glue everything in place).

DSCF07162

7. Bake for 8 minutes at 400 degrees (cheese should be gooey).  If you want to be able to eat it with your fingers, let the pizza cool completely in the refrigerator.  It makes a great breakfast if you have leftovers!  Or if you’re in a hurry, let it cool for a couple of minutes so you don’t burn yourself and then grab a fork.

Eggplant Bake (gluten-free & vegetarian)

Step 4[Update: This is no longer something I can eat due to new allergies, but still something I recommend.  I know it looks weird in the picture but it’s actually really tasty!]

Well, I might not have been posting but I’ve still been photographing pictures of my food and taking notes on how I’ve altered different recipes.  My laptop was temporarily out of commission, but now that I’m back online I can finally share what I’ve been up to.

Eggplant bake is one of my new favorite naturally gluten-free dinners.  The original version of this recipe came from  Frozen Assets: Lite and Easy by Deborah Taylor-Hough (check out her blog Cheap Eats).  In addition to being gluten-free, it’s also vegetarian and it’s easily made vegan (just leave off the yogurt topping).  So, what have all of you been cooking/baking this week?


Ingredients:

  • 2 medium eggplants
  • 2 and 1/2 tablespoons vegetable oil
  • 1 large onion
  • 1 (4 ounce) can of green chili
  • 1 (16 ounce) can stewed tomatoes
  • 3/4 teaspoon chili powder
  • 1 garlic clove (minced)
  • 3/4 teaspoon ground turmeric
  • 8 small tomatoes (sliced)
  • 1 and 1/2 cups plain yogurt
  • 1 and 1/4 teaspoons ground black pepper
  • 1 cup grated cheddar cheese (I used white cheddar)

Directions:

1.  Caramelize onions that have been cut into rings (sauté until golden brown) .

2.  Then, add can of green chili, onions, and turmeric  to the skillet.  After you’ve mixed it together, let it cook for a couple of minutes.

3.  Remove onion mixture from the skillet and put in the blender or a food processer with the can of stewed tomatoes.  Blend until it’s a sauce (but it’s okay if it’s still kind of chunky).

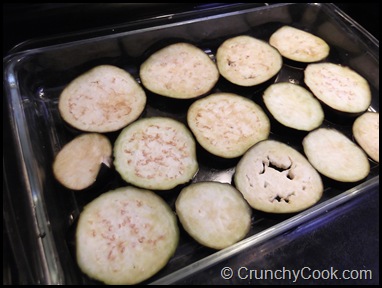
4.  Put the slices of eggplant evenly in the bottom of a dish (see bellow).

Step 1

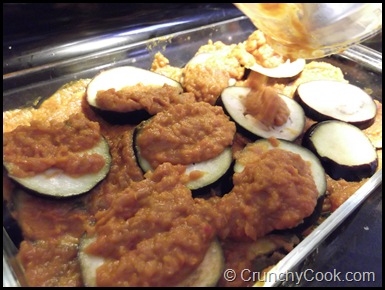
6. Spoon the tomato/onion sauce onto the eggplant.  Top with another layer of eggplant.  And then another layer of sauce and sliced tomatoes (the layering will go every other until the ingredients are used up, like you’re making a lasagna).

Step 2

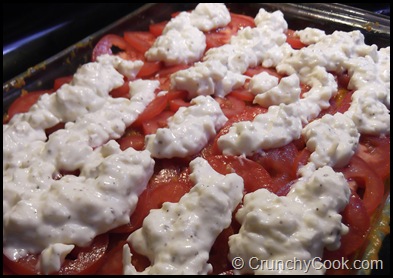
7.  Combine plain yogurt, cheddar, and pepper together in a bowl.  Once mixed, spread over the top layer of the eggplant bake.

Step 3

8. Bake in 350 degree oven for about 20 minutes.  Serve and enjoy.  Or you can wrap it with foil and freeze it for later.

Cake Brownies (gluten & sugar free)

DSCF0357[Update: As a result of new allergies, this isn’t something I can eat anymore.  But I’ve decided to leave it on the blog because they’re still yummy] I’d made gluten-free, egg-free, lactose-free brownies before (see the recipe) and they’d turned out well, but today I was in the mood for brownies that had a more brownie-like consistency.  So I decided to try a completely different recipe. These cake brownies are a bit lighter than usual brownies (they’re more like mini cakes in some ways than brownies), but they still hit the spot and they were very easy to make.


Ingredients:

  • 3/4 cup butter
  • 1 and 1/2 cups Splenda or generic brand of sucralose (if you don’t need it to be sugar-free, you can use 1 and 1/4 cups sugar)
  • 1/2 cup unsweetened cocoa powder
  • 2 eggs
  • 1 teaspoon vanilla
  • 1 and 1/2 cups brown rice flour (gluten-free)
  • 1 teaspoon baking powder
  • 1/4 teaspoon baking soda
  • 1 cup milk

Directions:

  1. Microwave butter until melted (or you can melt it on the stove in a saucepan).
  2. Stir melted butter, Splenda, and cocoa powered together in a bowl.
  3. Add the two eggs and vanilla, gently mixing until just combined.
  4. In another bowl, combine rice flour, baking powder, and baking soda together.
  5. Now, take turns adding the four mix and milk to the cocoa mixture and stirring after each.
  6. Pour the batter into a pre-greased 15x10x1 pan.
  7. Frost the brownies once they’re cooled.  I used Pillsbury Creamy Supreme Sugar Free Chocolate Fudge Flavor Frosting but you could also make homemade frosting.
  8. After you’ve frosted the brownies, let them sit in the refrigerator so the frosting can set (it’ll make it easier to cut through).  Then, serve and enjoy.

Shake-N-Bake Pork Chops (gluten-free)

Pork[Update: I can’t have pork anymore, found out that I was allergic.  But because the recipe turned out well and is good for gluten-free folks, I’ve left it on the blog]

Both my mom and I can’t have beef  and sometimes we really want something steak-like.  I miss having a nice piece of meat that you have to cut with a knife.

As a result, my mom came up with this tasty gluten-free, beef-free recipe that even tastes good when it’s been reheated the next day!  Enjoy.


Ingredients:

  • Pork chops
  • 1/2 cup corn meal
  • 1/2 cup rice flour (or tapioca flour)
  • 1 tsp. salt
  • 1/2 tsp. black pepper
  • 1 tsp. Mrs. Dash
  • Milk (just a small bowl to dip the pork chops in)

Directions:

  1. Mix corn meal, gluten-free flour, and seasonings together in a 1 gallon plastic bag (my mom always uses a zip-top bag to keep it from exploding all over the kitchen).
  2. Dip the pork chops in the bowl of milk on both sides.
  3. Put the pork chops into the shake-n-bake bag (one at a time).  Shake until the pork chop is coated.
  4. After coating, put the pork chops on a lightly greased cookie sheet.
  5. Bake at 425 for 20-25 minutes.
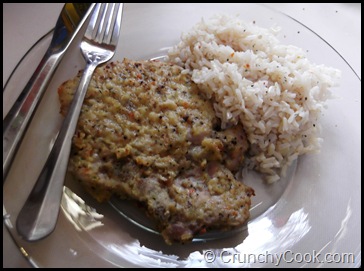
  6. And you’re done!  It goes great with brown rice or a salad.

Chocolate Birthday Cake (gluten & sugar free)

[Update: Due to new allergies, this isn’t something I can eat anymore.  But I’ve left it on the blog because it’s tasty]

In honor of my sister’s seventeenth birthday, I attempted my first gluten-free cake.  As many gluten-free people know, a birthday just isn’t quite the same without cake.

I didn’t have much luck finding a classic chocolate cake recipe that was gluten-free, so I modified a standard cake recipe by changing the flour and sweetener.

Unfortunately, I got a little confused while mixing the ingredients, didn’t mix them in quite the right order, so the cake turned out a little denser than I would’ve liked.  It still tasted nice, though.  I also discovered that frosting a cake is much harder than I’d imagined. My hat goes off to everyone who is able to make frosting look like an art form (I’m just happy if I can get it on the cake and not all over the kitchen).


Allergan/Sensitivity Info: Gluten-free, sugar-free, nut-free.   

Ingredients:

  • 3/4 softened butter (don’tput it in the microwave, let it stand for about 30 minutes)
  • 3 eggs (these also need to be at room temperatures, so you can let them sit with the butter)
  • 2 cups brown rice flour(gluten-free)
  • 3/4 cup unsweetened cocoa powder
  • 1 teaspoon baking soda
  • 3/4 teaspoon baking powder (check the label to make sure it’s gluten-free)
  • 1/2 teaspoon salt
  • 2 and 1/3 cups Spenda/generic brand of sucralose (you can also use 2 cups sugar instead if you don’t need it to be sugar-free)
  • 2 teaspoons vanilla
  • 1 and 1/2 cups milk

Directions:

  1. Lightly grease the bottoms of two cake pans (either 8x8x2-inch square pans or 9×1 1/2-inch round pans).  Line the bottoms of the pan with waxed paper (I didn’t have any on hand so I lightly dusted the bottom of the pans with coco powder after I’d greased them).
  2. Stir together flour, cocoa powder, baking soda, baking powder, and salt (in other words, all of the dry ingredients except the Spenda/sugar).
  3. Use an electric mixer to beat the butter for about thirty seconds. Then, slowly add Spenda/sugar and beat it for a couple of minutes until well combined (don’t forget to scrape the sides of the bowl).
  4. Add eggs to the butter and Speenda/sugar mix.  Mix for about a minute after adding each egg.  Then, beat in vanilla.
  5. Now, alternate between adding the milk and the flour mixture to the butter mix.  Beat together.
  6. Divide the batter between the two pans and spread it out evenly.
  7. Bake at 350 degrees for 35 to 40 minutes (until a toothpick comes out clean).
  8. Cool cakes completely before removing them from the pans.
  9. Frost with whatever you like and serve.  I used Pillsbury’s Creamy Supreme vanilla frosting (both sugar-free and gluten-free).  Homemade cream-cheese frosting would also be yummy.

Chocolate Mousse (gluten & sugar free)

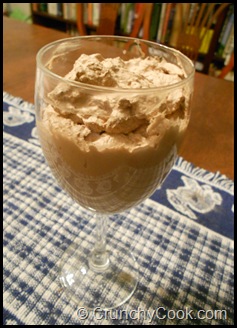
Chocolate Mousse[Update: I can no longer eat dairy, found out that I’m allergic.  But because this recipe was one of my all-time favorite desserts, I’ve left it on the blog]

Valentine’s Day may be over, but that’s no reason to put the chocolate away.  Bring on the mousse!

You can buy gluten-free, sugar-free mousse mixes in the store, but they’re kind of pricy and the ingredient list contains way too many unidentifiable things.  This is cheaper not only cheaper, but it also only has four ingredients.  And it’s super simple, quick, and quite yummy.

It’s also a great desert to serve picky wheat-eaters (you know, the ones who think anything that says it’s “certified gluten-free” will taste like dirt) because they’ll never guess it’s gluten-free!


Allergan/Sensitivity Info:Gluten-free, egg-free, soy-free, nut-free, sugar-free.

Yields: About four to six servings (it just really depends completely on how much you’re in the mood for chocolate).

Ingredients:

  • 2 cups heavy cream
  • 2 tablespoons vanilla
  • 3 tablespoons unsweetened cocoa powder
  • 1 cup Splenda (or any generic form of sucralose)

Directions:

  1. Use an electric mixer to mix cream until it just starts to get fluffy.
  2. Add vanilla, cocoa powered, and Splenda.
  3. Mix until light and fluffy (be careful to not over mix the cream because it won’t be as light and fluffy then).
  4. Divide into smaller containers (or you could always eat it right out of the bowl), and serve.  You can also let it sit in the refrigerator if you want it to be colder.  It tastes quite nice chilled, but I can never wait that long.

Cream Cheese Frosting (gluten-free & sugar-free)

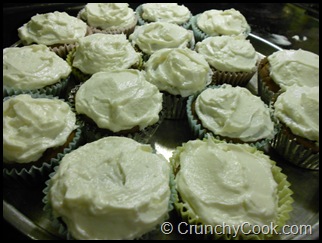
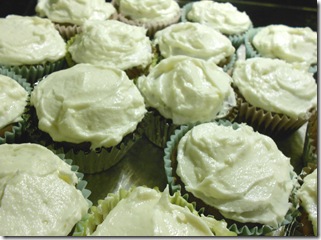
DSCN0802[Update: Well, I’m now allergic to dairy, so cream cheese frosting isn’t an option anymore.  But it’s pretty good, and easy, so give it a try!]

Making frosting from scratch was a new experience for me.  And, of course, the fact that it needed to be both gluten and sugar free and hopefully still tasty, made it seem a little more daunting.

As a result, I was pleasantly surprised with how easy (and yummy) cream cheese frosting turned out to be.  And it works well with chocolate cupcakes.


Allergan/Sensitivity Info:

Yields: About 3 and 2/3 cups (just enough to frost 18 cupcakes or a small cake).

Ingredients:

  • One 8-ounce package of cream cheese
  • 1/2 cup of butter (softened)
  • 2 teaspoons vanilla
  • 4 cups Splenda (or generic form of sucralose)

Directions:

  1. With an electric mixer, beat together cream cheese, butter, and vanilla.
  2. Slowly add Splenda.
  3. After everything is well mixed, frost cupcakes or cake or cover and store it in the refrigerator.

Chocolate Cupcakes (gluten-free & sugar-free)

DSCN0799[Update: Sadly, due to new food allergies, this isn’t something I can eat anymore.  But it’s yummy!  So you should still give it a try]

My very first attempt at making gluten-free, sugar-free cupcakes went alright, but the consistency was a little funky and they left an odd aftertaste in your mouth (I’ve decided that garbanzo flour most be an acquired taste).

On my second try, these little guys turned out perfectly—light and most, held together well, and not even a hit of garbanzo flour.  Success!  Not only was everyone in the house happy to eat them, but I’m going to use the same recipe to make two birthday cakes this next month.  I’ve never made a gluten-free, sugar-free cake before, so that should be fun.  


Algerian/Sensitivity Info: Gluten/wheat-free, sugar-free, and nut-free.

Yields: 18 cupcakes.

Ingredients:

  • 3/4 cup butter (softened)
  • 3 eggs
  • 2 cups gluten-free white rice flour
  • 3/4 cup unsweetened baking coco powder
  • 1 teaspoon baking soda
  • 1/4 teaspoon baking powder
  • 1/2 teaspoon salt
  • 2 and 1/3 cups Splenda (or any generic brand of sucralose)
  • 2 teaspoons vanilla
  • 1 and 1/2 cups milk

Directions:

  1. Mix together rice flour, coco powder, baking powder, baking soda, and salt.
  2. In a separate large bowl, beat butter and Splenda together with an electric mixer.  After it is well mixed, gradually add in one egg at a time.  And then, add vanilla.
  3. Slowly add flour mix and milk to the butter mixture.  Beat with the electric mixer.
  4. Place cupcake liners in pan.  And then, slowly spoon batter in.  Be sure to leave some room at the top for the cupcakes to grow.
  5. Bake at 350 for 20 minutes.
  6. Add whatever frosting you like (I recommend homemade cream cheese frosting).

For automatic updates, “like” The Crunchy Cook on Facebook.